Getting Started
Installation
Scientific software installation always a pain. We will try all our best to describe the process clearly, but in case of any difficulties do not hesitate to contact us (see Contacts).
Installation process consists of multiple (but simple) steps:
Set up Python. Please, download and install the latest Anaconda Python3 distribution from https://www.anaconda.com/download/ which will be compatible with your OS. You can refer to conda documentation for a detailed installation instructions.
Download the source code. Unfortunately, on the current stage of development it is impossible to install rainymotion using pip or conda Python package managers. The only way we can offer you is to download the source code from the rainymotion repository on the Github on your computer. This way actually has more pros, than cons: you will have not only the code, but sample data, using examples, and documentation in one place.
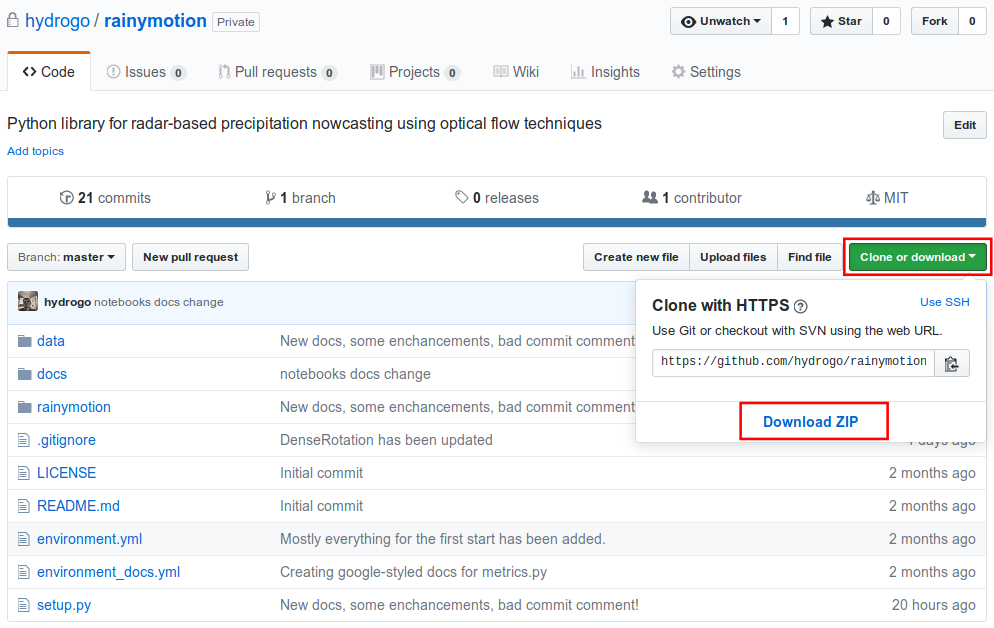
To download the source code as a .zip archive you have to go to the rainymotion repository on the Github and press the green button “Clone or download”. Then you can extract this archive to any folder on your computer.
For users familiar with a command line and git there is the easier way to download the source code:
git clone https://github.com/hydrogo/rainymotion.git
Set up Python environment. It is pretty common thing in software installation that something went wrong and not only installation process failed, but other software has beeb corrupted too. To avoid such a headache, it is better to use isolated python environments. To create one, you need to enter the main rainymotion directory, run a command line from there, and then run:
conda env create -f environment.yml
The command above creates the isolated python environment rainymotion which can be activated via command:
# on Linux and MacOS
source activate rainymotion

# on Windows
activate rainymotion
To come back to normal life without Python and radar-based precipitation nowcasting, in your command line run:
# on linux and macOS
source deactivate

# on windows
deactivate
Installing the rainymotion package. Firstly, be sure that you are in the main rainymotion directory, then into your command line run:
python setup.py install
Well done! You have (probably) installed the rainymotion library.
Check the installation. To be sure that installation process had been correctly finalized, in your command line run:
# 1. start Python interpreter
python

# 2. import rainymotion
>>>import rainymotion
If no error is raised: good job, now you have a working python environment with the rainymotion library inside. You are ready to nowcast something.
Quick overview
The main aim of the rainymotion library is to provide open and reliable models for radar-based precipitation nowcasting based on optical flow techniques.
rainymotion had not been writing from scratch. We incorporated the best open software solutions and provided a clue to make them work together.

There are two general groups of models we provide for precipitation nowcasting: based on a local optical flow ( the Sparse group, and on a global optical flow (the Dense group).
Every model has the same structure, so the default workflow does not vary from model to model:
# 0. activate rainymotion environment
source activate rainymotion

# 1. start Python interpreter
python

# 2. import rainymotion models
>>>from rainymotion.models import Dense

# 3. initialize the model instance
>>>model = Dense()

# 4. transfer radar data to .input_data placeholder
>>>model.input_data = np.load("/path/to/data")

# 5. run the model to get nowcast
>>>nowcast = model.run()
You can find more examples in the tutorials and examples section.
Contacts
You can contact the team of developers in many ways:
- raise an issue in the
rainymotionGithub repository - send an email
- send a message in Telegram